Hey everyone, it is Brad, welcome to my recipe site. Today, we’re going to prepare a distinctive dish, chewy chocolat l'orange baguette. One of my favorites food recipes. For mine, I will make it a little bit unique. This is gonna smell and look delicious.
Chewy Chocolat l'Orange Baguette is one of the most favored of recent trending foods on earth. It’s simple, it’s quick, it tastes yummy. It is enjoyed by millions daily. They are nice and they look fantastic. Chewy Chocolat l'Orange Baguette is something which I have loved my whole life.
To get started with this particular recipe, we must first prepare a few ingredients. You can cook chewy chocolat l'orange baguette using 8 ingredients and 47 steps. Here is how you cook it.
The ingredients needed to make Chewy Chocolat l'Orange Baguette:
- Get 146 grams All-purpose flour…'A'
- Prepare 4 grams Black cocoa powder (regular cocoa powder is fine)…'A'
- Prepare 1/5 grams Dry yeast (I use SAF brand Red label) …'B'
- Make ready 3/10 grams Malt powder…'B'
- Take 2 grams Natural salt (I use Guérandais)…'B'
- Prepare 115 grams Water (I use hard water)
- Take 40 grams Chocolate chips (confectionary grade)…'C'
- Take 1 same amount as the chocolate chips Orange peel (I use Umehara brand/for a recipe for homemade orange peel, see Step 45)…'C'
Instructions to make Chewy Chocolat l'Orange Baguette:
- Combine the 'A' and 'B' ingredients in a bowl, and whisk them until evenly combined.
- For those who don't have a means to measure 0.1 g: Filling a 1/2 teaspoon measure with 0.2 g dry yeast will give you this amount. Approximately 1/8 of a half-teaspoon
- Filling a 1/2 teaspoon measure with 0.2 g malt powder should look like this. Approximately 1/3 of a half-teaspoon or less
- Add the water to the dry ingredients from Step 1. Using a rubber spatula, lift the mixture from the bottom of the bowl in a cutting motion, then press down on top. Repeat this motion until no longer floury.
- Cover the bowl in plastic wrap or a shower cap to keep moist, then let sit for 30 minutes at room temperature (20-27℃).
- After 30 minutes, using a spatula or scraper and your hands, lift up the dough, then punch it down. Repeat this 4 times.
- If you find any lumps during this process, press them out with your fingers. Bring the dough together, cover in plastic wrap again, then let sit for 30 minutes again at 20-27℃.
- After 30 minutes, stretch out the dough, then fold it over, then repeat twice while rotating the dough in the other direction. Bring the dough together, then let it sit again for another 30 minutes as in Step 7.
- I use a spatula and four fingers to carefully stretch the dough and fold it. Coating your fingertips with a dab of oil makes this step easier.
- After 30 minutes, repeat Step 8 by stretching out the dough and folding it twice, then bring the dough together.
- Be careful not to dry out the dough in this next step. Let sit for 20 hours at 7-10℃ until the dough rises 2 1/2 times the original size.
- If you are in a hurry, let it rise for 6 hours at 25℃. Adjust the rising time and environment to best suit your lifestyle.
- The above are the basic steps for preparing the dough, but for more details, seefor Chewy Baguette Dough.
- While waiting for the dough to finish rising, spread out a sheet of canvas to use as a baking couche and dust with a liberal amount of bread flour. *Use plenty if the canvas is damp.
- Once the dough finishes rising, use a scraper to gently transfer it to the canvas. *The dough that was on the bottom of the bowl should now be on top.
- While taking care not to handle the dough too much, divide it into desired amount of baguettes for baking. *I divided it into three ficelles.
- Carefully cover the dough with a tightly wrung damp cloth or bowl to prevent it from drying out and let it sit for 30 minutes. *If the dough gets too hot, place it in the refrigerator.
- After 30 minutes, turn the dough loaves on their sides to even out the thickness of the dough into a rectangle, then place the "C" ingredients on top of the dough in a line 1/3 from the base.
- While placing the "C" ingredients on the dough, be careful not to press out the air pockets in the bread; use only enough pressure to gently spread out the large air pockets, and with the heel of your palms carefully flatten out the dough.
- Incorporate the "C" ingredients from Step 18 by rolling the dough from the bottom edge closest to you, bringing the rolled edge to the center. Next, place another batch of the "C" ingredients along the center line.
- With the "C" ingredients in the center, bring the bottom edge furthest from you up and over the "C" ingredients and seal the loaf. Refer to Step 25.
- With the seam at the top, gently form the loaf to an even thickness with the heel of your palms. Then, place the final batch of the "C" ingredients along the center line.
- With the "C" ingredients in the center, bring the bottom edge furthest from you up and over the "C" ingredients and seal the loaf. Refer to Step 25.
- Carefully seal the seams from Step 23. Roll the loaf in the canvas to form an even thickness and your desired length.
- If it's hard to form the loaf with a large amount of dough, use your thumb to align the "C" ingredients. (Refer to Steps 34-38 of.)
- The "C" ingredients should be rolled into the dough in 3 batches. The "C" ingredients should be divided up into 3 equal portions to prepare for this step. I divided mine into 9 batches (3 for each loaf).
- Open up the pockets of the canvas, and place the dough loaves inside. To make sure the loaves don't lose shape, gather the edges of the canvas and secure them with a clip or similar device.
- Allow the dough to rise to 1.5 times the original size for a final proving at 28-33℃.
- To determine the completion of the final proving, I judge by the appearance and the length and width of the center of the loaves.
- Line a heat-proof board or thick sheet of cardboard with parchment paper. *Ideally, the surface of the board should be smooth enough for the parchment paper to sliding off (when transferring it to the oven).
- After the final proving is done, transfer the dough to parchment paper. I use a thin cutting board to roll the dough onto the parchment paper as shown.
- Lightly dust the dough with flour using a tea strainer, then slash the tops with a sharp knife.
- Before baking, liberally mist the baguettes (avoiding the slashed part). *For those with a steam-bake function, mist the oven interior according to the oven manual.
- The steam is an essential part of this recipe. With hard breads, the flour dusted barely remains after baking. Since I don't have steaming baking function on my oven, I mist them well before baking.
- Preheat an oven on the highest setting, then reduce to 230℃, and place the dough onto the baking tray by sliding them with the thin cutting board.
- Mist the oven interior several times, then bake for 15 minutes. Then reduce to 200-210℃ for 5 minutes or more (depending on the size of your baguettes). Then, they're done.
- The baking time may vary depending on your oven. The ideal condition for baking these baguettes is 15 minutes at 230℃ and 5 or more minutes at 200℃.
- The final 5 minute baking time or more depends on how much flour you used for each baguette. For 75 g flour, bake for 8 more minutes, 100 g @ 11 minutes, 150 g @ 15 minutes, and 200 g for 22 more minutes.
- With an oven with a steam-bake setting: Bake for 5-10 minutes with steam, then bake for the rest of the time without it.
- Since my oven doesn't have a steam-bake setting, I have experimented with the best solution for bread baking without one.
- If you're having trouble with the bread not expanding or rising, give my method a try.
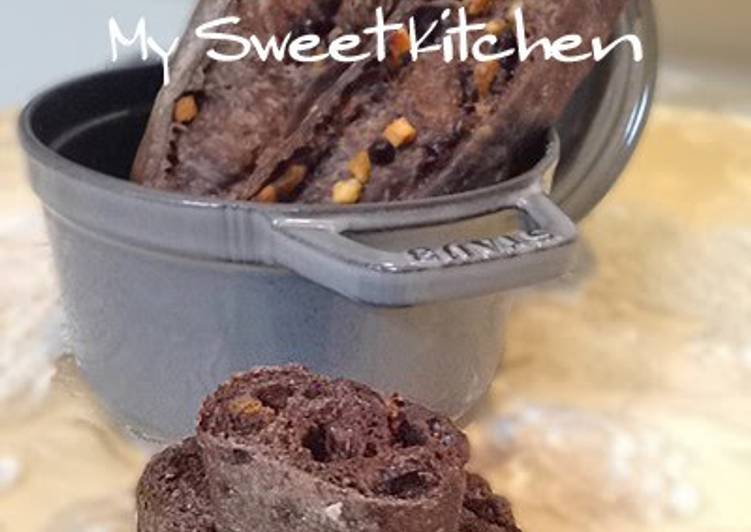
- The long rising time with a small amount of yeast gives this bread a rich chocolate taste. The chocolate chips and orange peel morsels are truly delightful.
- This is my favorite combination of ingredients for baguettes. Form the bread into your favorite sizes and shapes.
- I've listed the process here, but if you would like to know all of the hints and key points to bread baking, see.
- [Addendum] I always use Umehara brand orange peels, since they are moist and have a delightful liqueur aroma.
- If using ordinary orange peels, you can try soaking them in a few drops of orange curaçao the day before for a richer aroma and texture.
- Place the liqueur and orange peels in a heat-proof dish, microwave, then cool. Be sure to remove the moisture before using the peels.
So that is going to wrap this up with this exceptional food chewy chocolat l'orange baguette recipe. Thank you very much for reading. I’m sure you will make this at home. There’s gonna be interesting food at home recipes coming up. Don’t forget to bookmark this page in your browser, and share it to your family, friends and colleague. Thanks again for reading. Go on get cooking!